There’s a bunch of fun tools and accessories to help the ice cream lover in your life level up their technique. Here’s my top gift ideas of things you could give them.
Of course the first step is their ice cream machine–this is my favorite: Cuisinart 21 ice cream maker. Once they have the ice cream machine, here’s some other fun kitchen tools!
As an Amazon Associate I earn from qualifying purchases.
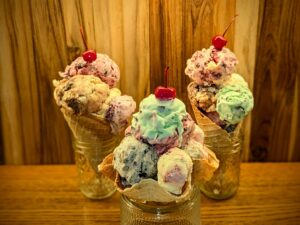
Waffle Cone Supplies
Waffle Bowl Form
We love these Non-Stick Fluted Tortilla Shell Pans available on Amazon. Simply make a waffle using the Waffle Cone Iron and drop it into this form, and you have a delicious waffle bowl for your ice cream.

Waffle Cone Iron
I use this Chef’sChoice WaffleCone Express 838 Ice Cream Cone Maker, available on Amazon, to make waffle cones or waffle bowls.

Cardboard Storage Containers
You can store your finished ice cream in any container you want that has a lid, including glass, plastic, cardboard, etc. I like using cardboard containers with lids because it makes it easy to give away ice cream to friends without needing to get the dishes back, and because cardboard containers are inexpensive, light weight, stack well, and don’t get brittle when they are cold. Plastic containers work too, but most plastics get brittle when they are cold. If you use too much force trying to scoop out frozen ice cream, the brittle plastic can shatter leaving shards of plastic in your ice cream and on your counter.
Here are the kind of cardboard containers we use. Click here for link on Amazon. Or, I can often get them cheaper here at Webstaurant.

Printable Labels
You don’t need to label ice cream if you only make a single batch and it is just for yourself. However, if you are going to give some away, or have several flavors of ice cream in the freezer, it is nice to label them. You can just write the flavor on a piece of freezer tape or on the lid of a cardboard container. We make a lot of ice cream, so I buy sheets of printable peel off labels and print a sheet for each of the flavors I make. That makes it very neat and saves a lot of time labeling the containers. I like these Printable Labels available from Amazon. I print them with my laser printer so the ink doesn’t run when the label gets wet or icy. They are 1″ x 2-5/8″ and can be printed in Word under Mailing, labels.

Appliances
Digital IR thermometer
An IR thermometer is inexpensive and very handy for measuring temperatures without having to insert a thermometer. For example, I use it to monitor the temperature of my milk/egg mixture when I am pasteurizing it until it is close to 160F. I use it later to check the temperature of the milk/egg mixture after it has been in an ice bath for some time, since I can just point it at the Ziplock bag rather than having to insert it into the mix. I use it to measure the temperature of my caramel or butterscotch while they are cooking since inserting an immersion thermometer or candy thermometer interferes with whisking the ingredients or can sauce the caramel to sugar. I use it to check the temperature of my chest freezer to find the coldest spot for my ice cream tubs. This Etekcity Infrared Thermometer Laser Temperature Gun 1080 has a temperature range of -58°F~ 1130°F and is available on Amazon.

Instant Read Digital Immersion Thermometer
We use this to measure the temperature of the egg/milk mixture once it is close to 160 F. I find it gives a more reliable temperature of the mixture in the middle and near the bottom of the pan, as opposed to the IR thermometer which only sees the top surface of the mixture. Since the eggs in the mixture are starting to cook at 160 F, and since you want to remove the mixture from the stove as soon as it reaches 160 F, an accurate, rapid temperature measurement is fairly critical. I like this Lonicera Digital Cooking Thermometer available on Amazon because it responds quickly, has a backlight and is easy to read, and is inexpensive.

Digital Kitchen Scale
You don’t have to have a kitchen scale to make these recipes, but I find that it makes it much simpler. I have listed the amounts of the ingredients in teaspoons, Tablespoons, cups, etc. in the recipes. I have also listed what that amount is equivalent to in grams. This makes it very easy if you want to change the quantity you are making. For example, if your ice cream machine holds more or less than mine does, measuring ingredients by weight makes it very easy to change the quantities of all of the ingredients to make three quarters, double, triple, or other multiples of the recipe. A scale also comes in handy if you are making several batches of the same flavor and have made prepped some of the ingredients ahead of time, to then separate them back out into enough for each batch. I do this when prepping the fruit, cookies, caramel, nuts, egg/milk mixture, etc.
I like this SOYOK Digital Kitchen Food Scale available on Amazon because it is extremely inexpensive, measures to 1 g but has a capacity of up to 5 Kg (approximately 11 lbs.), it has a Tare Weight function so you can zero out the weight of the bowl holding your ingredients, and the battery lasts a long time.

Precision Digital Scale
You probably won’t use this very often. It measures in hundredths of a gram, and I only use it when I need to measure very small quantities of ingredients, such as a few grams of citric acid, or a few drops of an intense flavoring. I like this AMIR Digital Precision Scale available on Amazon. It is very inexpensive, can measure up to 500 g (about 1 lb.) in 0.01 g increments, is backlit, and the battery lasts a long time. Be sure to not put anything heavy on it, it is only for very light loads.

Double Boiler
You can use a double boiler to heat the egg/milk mixture. If you don’t have a double boiler you can easily substitute using a metal bowl that rests on top of a saucepan with about a half-inch of water in it. See the Tip Pasteurized Eggs Instruction Sheet.
Portable Refractometer
All of the recipes include the correct amount of sugar to add to the fruit in ice cream. However, sometimes the fruit you buy is sweeter than other times, or maybe you want to make ice cream with a fruit not listed in our recipes. A Portable Refractometer is an inexpensive instrument you can use to determine the sugar content of fruit and then calculate how much more sugar to add to get to the desired 25%. See the Tip on Calculating Sugar to Add to Fruit.
I like this Portable Refractometer available on Amazon. (If you buy one, be sure you get the one for measuring sugar content, with a range of 0% to 32%, as there are other refractometers from the same company that look identical but are used to measure salinity, beer, honey, urine, etc., or that have a different range of sugar content)

Utensils
Zester
Use to remove zest (outer peel) from limes, lemons, oranges, etc. This is much easier than the fine teeth on a grater, and you are much less likely to scrape yourself. I like this Microplane Zester available on Amazon. See the Tip on Zesting Lemons

Silicone Mat and Cookie Sheet
Use silicone mats in cookie sheets when roasting nuts, heating raw flour, to pour out hot butterscotch to cool, to pour out hot chocolate/butter mix to cool, or to help in rolling waffle cones. Using a silicone mat eliminates most of the difficulty with clean up. It also makes it much easier to remove the cooled butterscotch or chocolate from the cookie sheet.

Small Silicone Spatula
These are very useful for scooping ice cream that has come up over the top of the dasher back into the tub, for cleaning ice cream off of the dasher, and for scraping ice cream off the inside of the tub without damaging the soft aluminum tub wall. These narrow Silicone Spatulas are available on Amazon.

Strainer
Use a fine strainer and a large heavy spoon or spatula to separate fruit juice from fruit pulp, or to remove small fruit seeds.

Timer
Use the timer on your phone or a digital timer to measure the amount of time you are blending ingredients, how long the ice cream has been in your ice cream machine, etc.